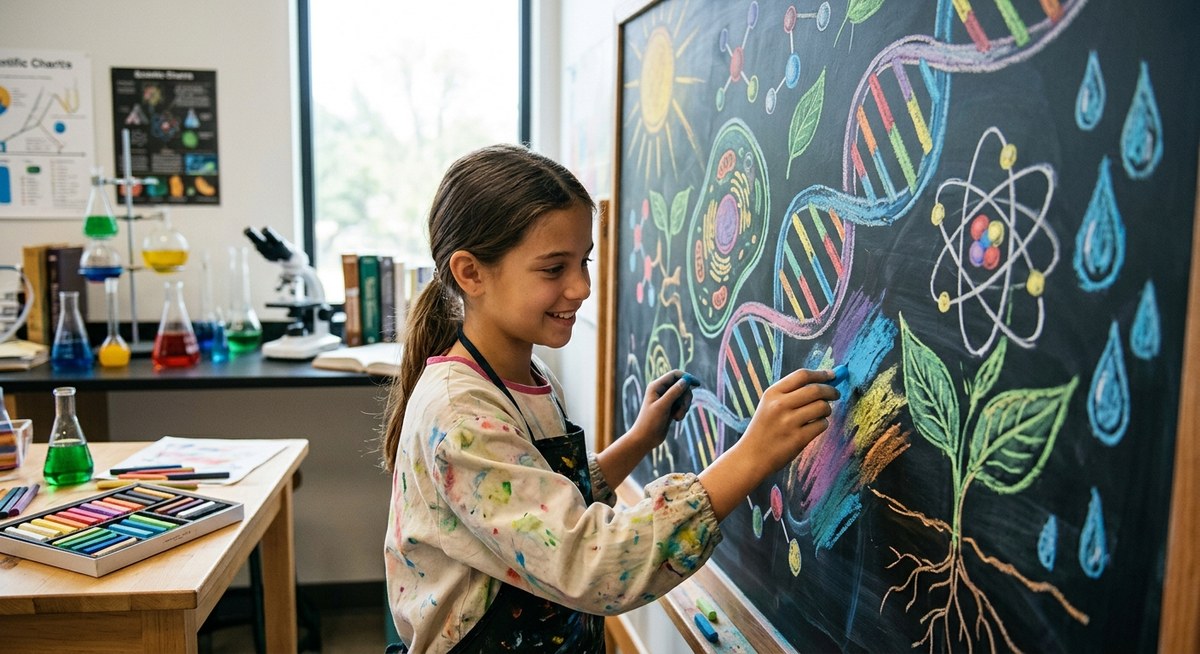
You walk into a classroom full of nervous energy, and you hand each student a stick of chalk pastel. Within minutes, the room goes quiet. Fingers smudge, colors blend, and suddenly a simple leaf sketch turns into a glowing sunset. That is the magic of chalk pastels. They are forgiving, vibrant, and perfect for young hands that are still building fine motor control. If you have been searching for chalk pastel art lessons for kids that actually work, this guide is for you. We will cover everything from setup to cleanup, plus a few tricks that turn a messy medium into a confident classroom staple.
Chalk pastels are one of the best tools for teaching color theory, texture, and blending to elementary and middle school students. With the right paper, a few safety tips, and structured practice, teachers can turn a potentially messy activity into a focused, rewarding art lesson that builds confidence and creativity.
Why Chalk Pastels Belong in Every Art Classroom
Chalk pastels offer something that markers and crayons cannot. They let kids blend colors directly on the page. That immediate feedback loop is powerful. A student presses down hard and gets a bold line. They lighten the pressure and the line fades. They smudge with a finger and two colors become a third. This tactile experience builds an intuitive understanding of color mixing.
Many teachers worry about mess. And yes, chalk pastels create dust. But with a few smart habits, the mess becomes manageable. Plus, the sensory nature of the medium helps students who struggle with fine motor tasks. The soft resistance of the pastel against paper gives clear tactile feedback. That helps kids learn control without frustration.
Setting Up Your First Chalk Pastel Lesson
Before you hand out supplies, take a few minutes to set expectations. This makes the difference between a chaotic dust cloud and a calm studio.
Materials You Will Need
- A set of chalk pastels. You do not need expensive artist brands. A basic classroom set of 12 to 24 colors works well.
- Paper with texture. Construction paper, pastel paper, or even cardstock with a slight tooth. Smooth paper does not hold the pigment well.
- Fixative or hairspray. To seal finished work and prevent smudging later.
- Paper towels or baby wipes. For hand cleaning between colors.
- Drop cloths or newspaper. To catch falling dust.
- Old shirts or aprons. Pastel dust travels.
A Simple Setup Routine
- Cover desks with newspaper or a drop cloth. This catches most of the dust.
- Give each student a sheet of paper and a small set of pastels. Limit the palette to five or six colors at first.
- Show students how to hold the pastel sideways for broad strokes and on its tip for fine lines.
- Demonstrate blending by smudging with a finger or a tissue. Encourage them to try it themselves.
- Set a timer for fifteen minutes of free exploration. Let them play with color and texture without any pressure to produce a finished piece.
- After the play time, guide them through a structured project. A simple subject like a piece of fruit or a leaf works well.
- When finished, spray the artwork with fixative in a well-ventilated area. If you use hairspray, hold it at least twelve inches away.
Common Mistakes and How to Fix Them
Even experienced teachers run into issues with chalk pastels. Here is a table that outlines the most common problems and their simple fixes.
| Mistake | What It Looks Like | The Fix |
|---|---|---|
| Muddy colors | Too many layers blended together | Limit the palette to three or four colors per project. Teach students to clean their fingers between colors. |
| Faded artwork | Using too little pressure or cheap paper | Switch to paper with more tooth. Show students how to press firmly for the base layer. |
| Excessive dust | Pastels are too soft or paper is too smooth | Use harder student-grade pastels. Tape paper down so it does not slide. |
| Smudged edges | Hands rest on finished areas | Place a scrap paper under the drawing hand. Work from top to bottom and left to right for right-handed students. |
| Pastels break often | Dropped or pressed too hard | Show students how to hold the stick near the middle. Keep a tray under the work area to catch broken pieces. |
Expert advice from a veteran elementary art teacher: “The biggest mistake I made was letting students use every color at once. Now I give them a small box with only the colors they need for that lesson. The results are cleaner, and the kids feel less overwhelmed.”
A Simple 4-Step Project: Chalk Pastel Sunflowers
This project works for grades two through six. It teaches layering, blending, and composition.
Step 1: Draw the Outline
Use a light yellow pastel to draw a large circle for the flower center. Add petal shapes around it. The lines do not need to be perfect. Encourage students to draw big. A sunflower that fills the page looks more dramatic.
Step 2: Add the Base Colors
Fill in the petals with yellow pastel. Use the side of the stick for broad coverage. For the center, use brown or dark orange. Press firmly so the color is rich.
Step 3: Blend and Layer
Use a finger or a tissue to blend the yellow petals outward. Then add a second layer of orange or gold near the center of each petal. Blend again. This creates depth. For the center, add small dots of black or dark brown to suggest seeds.
Step 4: Add Highlights and Details
Use a white pastel to add highlights on the top edges of a few petals. This gives the flower a sense of light. Add a green stem and leaves at the bottom. Blend the green with a touch of yellow to show where light hits the leaf.
Connecting Chalk Pastels to Other Subjects
Chalk pastels are not just for art class. They work beautifully in science and social studies lessons too. For example, you can have students sketch the layers of the earth using warm colors for the core and cooler colors for the crust. Or they can create a chalk pastel landscape of a biome they are studying. The blending ability of pastels makes it easy to show gradual changes in color, like the transition from desert to forest.
If you want to see how this kind of cross-subject teaching builds deeper understanding, take a look at how inquiry-based learning across disciplines can transform your classroom. Chalk pastels give students a visual way to represent concepts that might otherwise feel abstract.
Cleanup Tips That Save Your Sanity
Chalk pastel dust gets everywhere. But cleanup does not have to be a nightmare.
- Keep a spray bottle of water nearby. A light mist on the floor after class keeps dust from floating into the air.
- Have students wipe their desks with a damp paper towel before they leave.
- Store pastels in a divided container so colors do not mix. Egg cartons work well.
- Use a lint roller to pick up dust from clothes and carpets.
Why This Medium Builds Confidence
Chalk pastels are forgiving in a way that paint and markers are not. If a student makes a mistake, they can blend it into the background or cover it with a darker color. That freedom reduces fear. Kids who think they are “bad at art” often discover they can create something beautiful with pastels. The soft texture and bright colors give immediate satisfaction.
For more ideas on how to blend artistic expression with scientific discovery, check out this guide on bridging artistic expression and scientific discovery. The same principles apply whether you are teaching color mixing or the water cycle.
A Quick Reference for Lesson Planning
Here is a bulleted list of tips to keep in mind when you design your next lesson.
- Start with a limited palette to avoid muddy colors.
- Use textured paper for better grip.
- Demonstrate blending before asking students to do it.
- Keep baby wipes handy for quick hand cleaning.
- Spray fixative outside or near an open window.
- Let students practice on scrap paper first.
- Encourage big, bold strokes instead of tiny details.
- Display finished work with clips, not tape, to avoid tearing.
Teaching Blending Techniques Step by Step
Blending is the superpower of chalk pastels. Here is a numbered sequence to teach it clearly.
- Choose two colors that are next to each other on the color wheel, like blue and green.
- Lay down a strip of blue on the left side of the paper.
- Lay down a strip of green on the right side, leaving a gap between them.
- Use a clean finger to drag the blue toward the green.
- Wipe your finger clean, then drag the green toward the blue.
- Continue until the gap is filled with a smooth gradient.
- Repeat with other color pairs until the technique feels natural.
Once students master this, they can create sky gradients, ocean depths, and sunset transitions with ease.
The Surprising Science Behind Chalk Pastels
Chalk pastels are essentially pure pigment held together with a binder. When you drag a pastel across paper, tiny particles of pigment break off and stick to the tooth of the paper. That is why textured paper matters. The rough surface grabs the pigment. Smooth paper lets the particles fall off.
This physical process is a great conversation starter for a science lesson. You can talk about friction, adhesion, and how different materials interact. If you are interested in building more of these connections, read about how to integrate art and science in inquiry-based education. It will give you a framework for designing lessons that naturally combine both subjects.
Final Thoughts on Chalk Pastel Art Lessons for Kids
Chalk pastels are not just a fun activity. They are a serious tool for teaching visual thinking, color theory, and fine motor skills. The best part is that they level the playing field. A student who struggles with drawing can still create a stunning piece through blending and layering. That feeling of success is powerful.
Start small. Pick one project, gather your materials, and give yourself permission to get a little dusty. Your students will thank you. And the next time someone asks you about chalk pastel art lessons for kids, you will have a whole toolkit of strategies ready to share.
For even more ways to spark curiosity through interdisciplinary work, consider exploring how to design interdisciplinary projects that ignite student curiosity in 2026. The more you mix mediums and subjects, the more engaged your students will be.