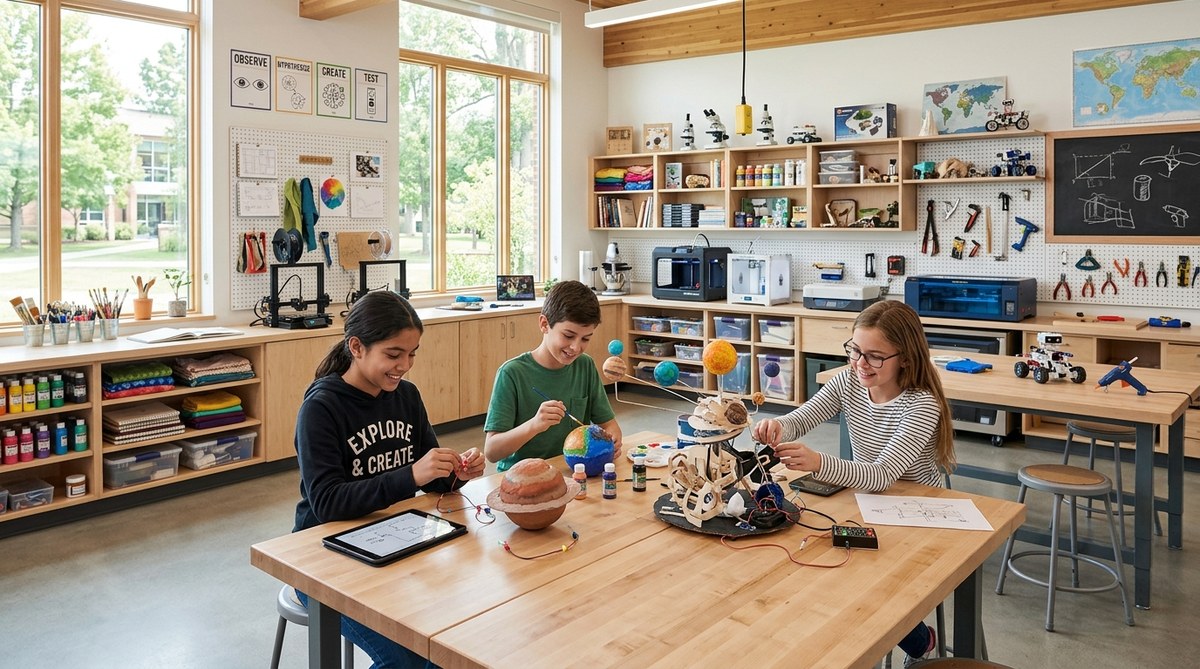
A school makerspace should feel like a laboratory for the imagination. It is a place where students test a hypothesis with their hands, then paint the results. It is where a failed circuit becomes the inspiration for a kinetic sculpture. For school librarians, STEM coordinators, and K-12 administrators, the challenge is designing a space that serves both the scientific method and the creative process. You want students to ask “what if” and then have the tools to find out. The best school makerspace design does not force a choice between art and science. It builds a bridge between them.
A successful school makerspace design balances hard science tools with creative arts materials. Focus on flexible furniture, clear zones for wet and dry projects, and storage that invites curiosity. Use inquiry-based prompts to guide student work. Avoid the trap of buying expensive gear before you know how students will use it. Start small, iterate often, and let student questions shape the space.
Why Art and Science Belong Together in a Makerspace
We often treat art and science as separate subjects. Art is in one wing. Science is in another. But in the real world, the boundaries blur. An architect uses physics and aesthetics. A product designer tests materials and considers color. A medical illustrator draws the human body with scientific accuracy and artistic skill.
When you design a makerspace that blends these disciplines, you prepare students for that reality. A student building a model rocket also designs the fins for drag reduction and paints the exterior for visibility. That is a natural blend of physics and design. The space should encourage those connections.
This approach aligns with the principles of When students see that a makerspace supports both a soldering iron and a paintbrush, they start to think in interdisciplinary ways.
The 5 Essential Zones for a Blended Makerspace
Your school makerspace design needs distinct zones. Each zone serves a purpose, but the zones should flow into one another. Here are the five zones that work best for blending art and science.
- The Wet Zone (Sink and Messy Materials). This area needs a deep sink, washable surfaces, and storage for paint, clay, plaster, and glue. Science experiments often involve water. Art projects often involve paint. Put them together here.
- The Dry Zone (Electronics and Tools). This is for soldering, circuit building, and 3D printing. Keep it away from the wet zone to protect electronics. Use anti-static mats and good task lighting.
- The Building Zone (Wood and Cardboard). A space for saws, hammers, hot glue guns, and cardboard. This zone requires ventilation and sturdy workbenches. It is where prototypes come to life.
- The Quiet Zone (Research and Planning). A few chairs, a whiteboard, and tablets or laptops. Students sketch ideas, write code, or look up scientific concepts before they build.
- The Display Zone (Show and Tell). Shelves or wall space where finished projects live. This zone motivates students and gives them a sense of ownership.
Common Mistakes in School Makerspace Design
Many schools spend their budget on the wrong things. They buy expensive 3D printers but forget to buy filament. They order fancy furniture that does not fit the room. They ignore storage. The table below shows common mistakes and how to fix them.
| Mistake | Why It Hurts | Better Approach |
|---|---|---|
| Buying too many high-tech tools | Students use them once, then they gather dust. | Start with low-tech consumables: cardboard, tape, string, markers. |
| No dedicated storage for ongoing projects | Students leave half-finished work on tables. | Use labeled bins or cubbies for each class period. |
| Ignoring ventilation | Fumes from glue, paint, or soldering build up. | Install a basic exhaust fan or open windows. |
| Fixed furniture | You cannot rearrange the room for different activities. | Use lightweight tables on casters and stackable stools. |
| No safety protocols | Students get hurt or damage equipment. | Post clear safety rules and train students before they touch tools. |
A Numbered Process for Designing Your Space
Follow these six steps to create a makerspace that truly blends art and science.
- Audit your existing space. Measure the room. Note the location of outlets, sinks, and windows. Take photos. Know what you are working with before you buy anything.
- Define your goals with your team. Ask your teachers: What projects do you want to run? Do you need space for robotics? Painting? Both? Write down the top three goals.
- Choose zones based on activities. Use the five zones from the list above. Adjust them based on your room size. A small room might combine the quiet zone and the building zone.
- Select furniture for flexibility. Buy tables that can be moved into clusters or pushed against the wall. Choose stools that stack. Avoid fixed lab benches unless you have a dedicated science room.
- Plan storage for consumables. Clear bins let students see what is available. Label everything. Store items by category: textiles, electronics, paper, plastics.
- Create a simple checkout system. Use a clipboard or a digital form. Students sign out tools and return them. This builds responsibility and keeps the space organized.
How to Blend Inquiry into the Space
A makerspace is not just about tools. It is about questions. When students walk in, they should feel prompted to wonder. You can do this with signage, prompt cards, and project starters.
Place a large whiteboard near the entrance. Write a weekly question on it. For example: “How can you build a bridge that holds 50 pennies using only paper and tape?” That question blends engineering (science) with design (art). Students sketch, test, and rebuild.
You can also create inquiry cards. Print cards that say things like: “What happens if you change the angle of this lever?” or “How can you use color to show temperature change in a data visualization?” These cards live in the quiet zone and guide student thinking.
For more ideas on this approach, read about Inquiry is the engine that drives a blended makerspace.
Budgeting for a Blended Makerspace in 2026
You do not need a huge budget to start. In fact, starting small is smarter. Here is a realistic budget breakdown for a mid-sized school makerspace.
- Low-tech supplies (first year): $500. Cardboard, duct tape, string, markers, glue sticks, scissors, fabric scraps.
- Basic electronics: $300. Arduino starter kits, LEDs, batteries, wires, breadboards.
- One 3D printer and filament: $400. A reliable entry-level printer and a few spools of PLA.
- Furniture: $800. Two folding tables, four stackable stools, a rolling storage cart.
- Safety gear: $100. Safety glasses, aprons, first aid kit, fire extinguisher.
Total for year one: about $2,100. That is manageable for most school budgets. You can add more tools in year two based on what students actually use.
“The best makerspaces grow organically. Buy the minimum to get started, then let student projects tell you what you need next. A room full of cardboard and curiosity beats a room full of unused laser cutters every time.” — Dr. Maria Chen, K-12 STEAM Coordinator
Tools That Bridge Art and Science
Some tools naturally sit at the intersection of art and science. These are worth prioritizing in your school makerspace design.
- Laser cutters. They cut wood, acrylic, and paper. Students design on a computer (art and math) and watch the machine execute (engineering).
- Sewing machines. Sewing involves geometry, tension, and material science. Students can sew circuits into fabric for wearable tech projects.
- Microscopes with camera adapters. Students capture images of leaves, fabric, or crystals. Then they edit the images digitally or print them for art projects.
- Vinyl cutters. Great for making stencils, stickers, and decals. Students learn about vector design and material properties.
- Pottery wheels and kilns. Clay work teaches chemistry (glazes, firing temperatures) and sculpture.
Encouraging Student Ownership
The makerspace will thrive when students feel it belongs to them. Give them a voice in the design. Ask students what tools they want. Let them help organize the bins. Create a student maker team that maintains the space.
Rotate student projects into the display zone. When a student sees their work on a shelf, they feel proud. Other students see it and get inspired. This creates a culture of making that spreads beyond the makerspace.
You can also host a monthly maker challenge. Give students a prompt that blends art and science. For example: “Build a musical instrument from recycled materials.” That challenge involves sound waves (science) and aesthetics (art). The winner gets their project displayed in the library.
Making It Work for Different Grade Levels
A makerspace for elementary school looks different than one for high school. But the principles are the same.
- Elementary (K-5). Focus on safety and large motor skills. Use thick scissors, large buttons, and simple circuits. Emphasize process over product.
- Middle school (6-8). Introduce soldering, basic coding, and more complex tools. Let students work in teams on projects that take multiple sessions.
- High school (9-12). Offer advanced tools like laser cuters, CNC routers, and sewing machines. Encourage independent projects and mentorship.
No matter the grade level, always include a reflection component. Ask students to write or draw about what they learned. This ties the hands-on work back to inquiry.
Your Next Steps
Designing a school makerspace that blends art, science, and inquiry is not a one-time event. It is an ongoing process. Start with a small budget. Focus on flexible furniture and simple supplies. Let student questions guide your purchases. Build zones that support different types of work. And always keep the display zone visible, because seeing what others have made is the best invitation to create.
The goal is not a perfect room on day one. The goal is a room that grows with your students. Every project they finish, every question they ask, and every mess they make will teach you what your makerspace needs next. So pick a corner, set up a table, and let the making begin.