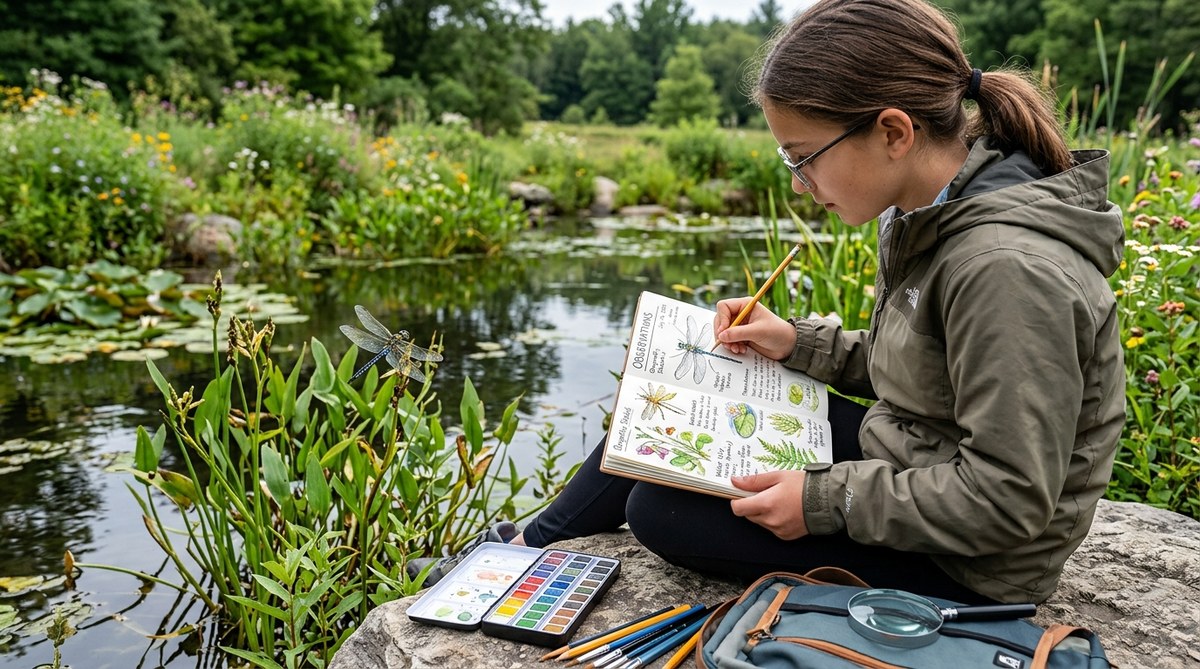
A fourth-grade student stares at a leaf for three seconds, writes “it is green,” and calls it done. That is not observation. That is glancing. Real scientific observation demands patience, detail, and a willingness to sit with uncertainty. Visual journaling bridges that gap. When students draw what they see, they slow down. They notice veins on a leaf, the way light hits a petal, or the subtle curve of a fossil. This practice trains the brain to look longer and think deeper.
Visual journaling strengthens scientific observation by forcing students to slow down and record details they would otherwise miss. This method works across all grade levels, from kindergarten to high school. It blends art and science naturally, turning every sketch into a data point and every question into a hypothesis. No expensive materials are needed. Just paper, a pencil, and curiosity.
Why Drawing Beats Writing for Observation Skills
Writing a description is useful, but drawing demands a different level of attention. When a student writes “the rock has gray spots,” they can stop there. When they draw the rock, they must decide where each spot sits, how big it is, and whether the edges are sharp or fuzzy. That decision-making process is where scientific thinking lives.
Visual journaling scientific observation is not about artistic talent. It is about accuracy. A messy sketch that correctly shows the position of a bird’s wing feathers is more valuable than a beautiful drawing that gets the anatomy wrong. Teachers should emphasize truth over beauty from day one.
“The act of drawing forces you to ask questions you did not know you had. You cannot draw a feather without wondering how it attaches to the bone.” — Dr. Maria Santos, biology educator and visual journaling advocate
A Simple Framework to Start Tomorrow
You do not need a special curriculum to begin. Follow these four steps to introduce visual journaling in any science classroom.
- Set a time limit. Give students three to five minutes for a first sketch. This removes the pressure to create art. They learn to capture essential shapes and patterns under a deadline.
- Add annotations. After the sketch, students spend two minutes writing observations. They can label parts, note textures, or record questions. This combines visual and verbal thinking.
- Repeat with a different angle. Ask students to rotate the object or change their viewpoint. A second sketch often reveals details they missed the first time.
- Compare and discuss. Have students share their journals in small groups. Comparing sketches helps them see what others noticed. This builds collaborative inquiry.
This framework works for a leaf, a rock, a chemical reaction, or a preserved specimen. It adapts to any grade level.
Common Mistakes and Better Alternatives
Even well-meaning teachers can fall into traps when using visual journals. Here is a table that contrasts common mistakes with more effective approaches.
| Common Mistake | Why It Fails | Better Alternative |
|---|---|---|
| Grading for artistic quality | Students focus on beauty instead of accuracy. | Grade for detail, labeling, and questions asked. |
| Giving too much time | Students rush or get bored. | Use timed sessions (3 to 5 minutes). |
| Using only one object per unit | Students lose novelty. | Rotate objects weekly: feathers, seeds, shells, minerals. |
| Skipping the annotation step | Observations stay shallow. | Always require written notes alongside sketches. |
| No peer discussion | Students miss alternative viewpoints. | Schedule 5 minutes for gallery walks or pair shares. |
Adapting Visual Journaling Across Grade Levels
Younger students need more structure. Older students can handle more independence. Here is how to adjust the approach.
- Grades K through 2. Use large paper and thick pencils. Focus on one object per session. Ask students to draw what they see and circle anything that surprises them. Keep sessions under ten minutes.
- Grades 3 through 5. Introduce labels and simple measurements. Ask students to add a “wonder” section where they write one question about the object. This builds the habit of inquiry.
- Grades 6 through 8. Require multiple sketches from different angles. Add a written hypothesis about the object’s function or origin. Students can compare their sketches with photographs or scientific diagrams.
- Grades 9 through 12. Use visual journals for lab work. Students can sketch microscope slides, dissections, or chemical changes. Ask them to write a short analysis connecting their drawing to a broader scientific concept.
This method works across subjects. A biology class can sketch cells. An earth science class can draw rock layers. A physics class can diagram the path of a pendulum. The skill transfers.
Materials That Work Without Breaking Your Budget
You do not need fancy supplies. Here is a list of materials that support visual journaling without costing much.
- Plain white paper or a simple sketchbook
- Number 2 pencils and erasers
- Colored pencils for adding detail (optional)
- A hand lens or magnifying glass
- A ruler for scale bars
- A timer (use your phone or a classroom clock)
That is it. No markers, no paint, no special notebooks. The focus stays on observation, not on supplies.
How to Handle Reluctant Students
Some students will resist. They might say “I cannot draw” or “this is stupid.” That is normal. Here are three strategies that help.
- Model the process. Draw alongside your students. Show them your own messy sketch. Talk about what you noticed while drawing. This normalizes imperfection.
- Start with familiar objects. A pencil, a shoe, a lunch apple. Students feel less intimidated when the subject is ordinary. Save the complex specimens for later.
- Celebrate questions. Praise a student who writes a good question more than one who draws a perfect picture. This shifts the reward system toward inquiry.
Over time, even the most resistant students begin to see the value. The key is consistency. Do it once a week, not once a semester.
Measuring Growth in Observation Skills
You can track progress without giving formal tests. Look for these signs over several weeks.
- Sketches become more detailed. Students start including texture, shadow, and scale.
- Annotations grow longer and more specific. Instead of “it is rough,” they write “the surface has small bumps spaced about 2 mm apart.”
- Questions become more sophisticated. Early questions might be “what is this?” Later questions might be “why does this side have more ridges than the other?”
- Students begin sketching without being asked. That is the ultimate sign of internalized practice.
For a deeper look at how this connects to broader teaching strategies, see our guide on how art sketchbooks deepen student thinking in science investigations.
Bringing Visual Journaling Into Your Weekly Routine
You do not need to overhaul your entire curriculum. Start small. Pick one day a week for a ten-minute visual journaling session. Call it “Observation Friday” or “Sketch and Wonder.” Over time, increase the frequency as students build confidence.
Here is a sample weekly structure for a middle school science class.
| Day | Activity | Time |
|---|---|---|
| Monday | Introduce the object. Students sketch and annotate. | 12 minutes |
| Wednesday | Students swap journals and add one observation. | 8 minutes |
| Friday | Students sketch the same object from memory. | 10 minutes |
This routine reinforces observation skills without eating into instructional time. The repetition builds a habit.
The Link Between Drawing and Deeper Inquiry
Visual journaling does more than improve observation. It opens the door to inquiry-based learning. When students notice something odd in their sketch, they ask a question. That question becomes a research project. That project builds critical thinking.
For example, a student sketches a feather and notices the shaft is not perfectly straight. They ask “why is it curved?” That question can lead to a mini-lesson on aerodynamics, bird flight, or evolution. The journal becomes a launchpad for discovery.
Read more about this process in our article on running art-integrated science lessons built around student questions.
What to Do When Students Get Stuck
Sometimes a student stares at a blank page. That is a teaching moment, not a failure. Use these prompts to get them moving.
- “Draw the outline first. You can add details later.”
- “What is the biggest thing you see? Start with that.”
- “Write down three words that describe this object. Then draw one of them.”
These small nudges keep the process moving. The goal is progress, not perfection.
A Final Word on Making This Work in 2026
Classroom demands are higher than ever. Teachers juggle standards, testing, and diverse student needs. Visual journaling is not one more thing to add. It is a tool that replaces shallow activities with deeper ones. When you replace a worksheet with a sketch and a discussion, you gain time and quality.
Start this week. Pick one object. Give students five minutes. Watch what happens. The results will surprise you.
If you want to see how this approach connects to a larger framework of interdisciplinary teaching, take a look at our piece on how interdisciplinary thinking sparked breakthroughs from da vinci to modern innovators. The same principles apply in your classroom today.
Your Turn to Try It
The best way to understand visual journaling is to do it yourself. Grab a leaf, a shell, or a simple tool from your desk. Set a timer for four minutes. Draw what you see. Then write one question you have about the object. Notice how much more you observe than if you had just looked at it. That is the power of this method. Now imagine what it can do for your students.