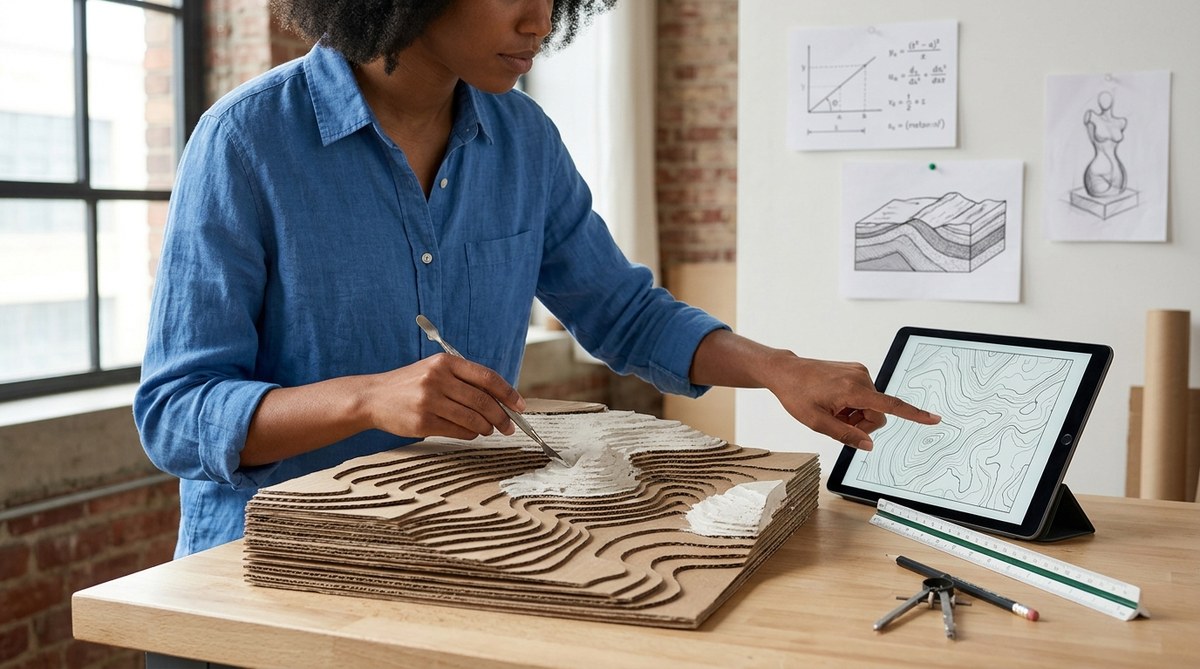
A pile of cardboard, a ruler, some glue, and a printed contour map. That is all it takes to launch one of the most powerful interdisciplinary projects a student can attempt. When a child builds a 3D topographic map project, they do not just learn one subject. They learn how to read the land, calculate scale, and shape a physical object with their own hands. The result is a lesson that sticks because it was built, not memorized.
A 3D topographic map project merges geology, math, and sculpture into a single hands-on activity. Students learn to read contour lines, calculate elevation ratios, and build layered landforms. This project boosts spatial reasoning, reinforces measurement skills, and encourages creative problem-solving. It is ideal for homeschoolers and STEM educators seeking an engaging, cross-curricular lesson that feels more like an art studio than a classroom.
Why a Single Project Covers Three Subjects
Most school days are broken into separate boxes. Math happens at 9 AM, science at 10 AM, and art after lunch. A 3D topographic map project smashes those boxes together. When students cut out each contour layer, they practice geometry and measurement. When they stack the layers, they see how elevation works in real space. And when they paint the final model, they use artistic judgment to show terrain features like ridges, valleys, and peaks.
This kind of learning feels natural. It mirrors how real problems work in the world. A civil engineer does not stop doing math when she starts sketching. A geologist does not stop using spatial thinking when she draws a cross section. By combining disciplines, students build a mental model that is stronger than any worksheet can provide.
For more ideas on blending subjects, read our guide on unlocking creativity by merging art and science in your classroom.
The Geology Behind the Layers
Before a student cuts a single piece of cardboard, they need to understand what a topographic map represents. Every line on a topo map connects points of equal elevation. When lines are close together, the slope is steep. When lines are far apart, the land is flat.
Key geology concepts taught in this project
- Contour lines and what they reveal about slope
- Elevation and how it changes across a landscape
- Landform identification (ridges, valleys, peaks, depressions)
- Map scale and how it translates to real-world distance
- Erosion patterns and why certain shapes appear on maps
Students start by choosing a real location. A local state park, a famous mountain range, or even their own neighborhood works well. They print a contour map of that area and study the lines. This step alone teaches observation skills that are central to geology. They notice how a river cuts a valley, how a ridge line runs between two peaks, and how the map uses color to show elevation bands.
After studying the map, students trace each contour interval onto a separate sheet of paper. This forces them to isolate one elevation at a time. It is a slow, careful process that rewards patience.
The Math Hidden in Each Layer
Here is where the 3D topographic map project really shines for math instruction. Every contour layer requires calculation. Students must decide on a vertical scale for their model. If the real elevation change is 500 feet and they want the model to be 5 inches tall, each inch represents 100 feet. That ratio becomes the foundation for all their measurements.
Practical math skills practiced
- Scale conversion: Turning real elevation into model thickness
- Ratio and proportion: Keeping horizontal and vertical scales consistent
- Area measurement: Calculating the surface area of each layer
- Volume estimation: Roughly calculating how much material they will need
- Geometry: Working with irregular shapes and symmetry
Students also learn to measure twice and cut once. A mistake in measuring a layer means the whole stack will not align. This teaches precision in a way that feels meaningful, not punitive.
“The best math lessons are the ones where students forget they are doing math. When a child measures a contour layer and realizes it does not fit, they have to figure out why. That is real problem solving.” – Middle school STEM teacher, Vermont
The Sculpture Process: Building With Your Hands
Now the project becomes physical. Students transfer each traced contour onto a sheet of cardboard or foam board. They cut out every single layer, starting with the lowest elevation and working up to the highest.
A step-by-step process for the sculpture phase
- Trace each contour onto the material. Label every piece with its elevation number so nothing gets mixed up.
- Cut each layer using scissors or a craft knife. For younger students, thick cardboard works best. For older students, foam board gives a cleaner edge.
- Stack the layers from bottom to top. Use a small amount of glue between each layer. Check alignment as you go.
- Fill the gaps with modeling clay or plaster. This creates smooth slopes between the stepped layers.
- Sand and smooth the surface once the filler dries. This turns the blocky stack into a realistic landform.
- Paint the model using elevation colors. Use green for lowlands, brown for mid elevations, and white or gray for peaks.
The sculpture phase teaches patience and fine motor control. It also gives students a chance to make creative choices. Should the river be carved deeper? Should the peak be sharper? Those decisions turn the project from a school assignment into a personal creation.
For more on the connection between making and learning, see why combining art and science unlocks deeper student engagement than any single subject.
Common Mistakes and How to Fix Them
Even experienced students run into trouble. Here is a table of frequent issues and their solutions.
| Mistake | Why It Happens | How to Fix It |
|---|---|---|
| Layers do not align | Tracing was off center | Use a lightbox or window to trace accurately. Stack and check alignment before gluing. |
| Model is too flat | Vertical scale is too small | Increase the thickness of each layer. Use foam board instead of thin cardboard. |
| Gaps between layers are too large | Material is too thick or filler was skipped | Use a thin layer of plaster or clay between each step. Sand after drying. |
| Map details are hard to read | Contour lines were too close together | Choose a map with a larger contour interval. Zoom in on a smaller area. |
| Paint bleeds across elevation zones | Paint was too wet or applied too thickly | Use acrylic paint with a dry brush technique. Let each color dry before adding the next. |
Adapting the Project for Different Ages
One of the best features of a 3D topographic map project is its flexibility. You can adjust the difficulty to match the student.
For grades K through 3
Keep it simple. Use pre-printed contour shapes and let the child stack pre-cut foam layers. Focus on the idea that higher means smaller. Paint with just two or three colors. The goal is exposure, not precision.
For grades 4 through 6
Have students trace their own contours from a simple map. Use cardboard and glue. Introduce the concept of scale. Let them paint with four or five elevation colors. Add a legend and a compass rose to the finished model.
For grades 7 through 12
Use a complex topo map of a real location. Require students to calculate the vertical scale themselves. Use foam board for cleaner cuts. Add contour lines drawn on the final painted surface. Include a written report explaining the geology of the area.
This project works for a single student or a whole classroom. It also works as a group activity where each student builds one section of a larger landscape.
Materials You Will Need
The materials list is short and inexpensive. Most items can be found at a craft store or ordered online.
- Printed contour map of your chosen location
- Cardboard or foam board sheets
- Scissors or a craft knife (with adult supervision)
- White glue or a hot glue gun
- Modeling clay or plaster of Paris
- Sandpaper (fine grit)
- Acrylic paint in earth tones
- Paintbrushes
- Ruler and pencil
Total cost for a single project is usually under $20. For a classroom of 25 students, buying foam board in bulk keeps the price low.
Why This Project Works for Homeschool Families
Homeschool parents often look for projects that cover multiple subjects in one sitting. Time is precious, and juggling separate lessons for geology, math, and art can feel exhausting. A 3D topographic map project solves that problem. One afternoon covers all three.
Parents also appreciate that the project is self contained. There is no need for expensive kits or special equipment. The skills build on each other naturally. A child who struggles with abstract math concepts often finds them easier to grasp when they are part of a physical model.
If you want to build a classroom culture that supports this kind of work, check out how to build a curiosity lab that merges art and science.
Making It Your Own
The beauty of this project is that no two models look the same. Students can choose any location that interests them. A child who loves the ocean might map a coastal dune system. A student fascinated by volcanoes could build Mount St. Helens. A sports fan might recreate the elevation changes on a famous hiking trail.
Encourage students to add extra features. They can glue on small twigs for trees. They can paint a blue ribbon to show a river. They can carve a trail into the surface with a toothpick. These additions turn the project into a personal expression of learning.
From Model to Real World Understanding
Once the model is finished, the learning does not stop. Students can compare their 3D model to the original 2D map. They can see how the flat lines they traced became a real shape. This comparison builds a bridge between abstract symbols and physical reality.
Ask students to explain their model to someone else. Teaching the project to a parent or a friend forces them to use the vocabulary they learned. They will talk about contour intervals, elevation, slope, and scale. That verbal practice solidifies the knowledge.
For more on turning student questions into research, read how to turn student questions into interdisciplinary research projects in 2026.
The Lasting Impact of Hands-On Learning
A worksheet gets graded and thrown away. A 3D topographic map project sits on a shelf for years. Students remember the afternoon they spent cutting, stacking, and painting. They remember the moment the layers clicked into place and the mountain appeared.
That memory is not just about the project itself. It is about the feeling of figuring something out with your own hands. It is the confidence that comes from taking a flat piece of paper and turning it into a three dimensional world. That is the kind of learning that lasts.
So grab a map, some cardboard, and a ruler. Start with a small area. Let the student make mistakes. Let them fix those mistakes. And when the final model is done, put it somewhere visible. It is a reminder that learning can be messy, creative, and deeply satisfying all at once.