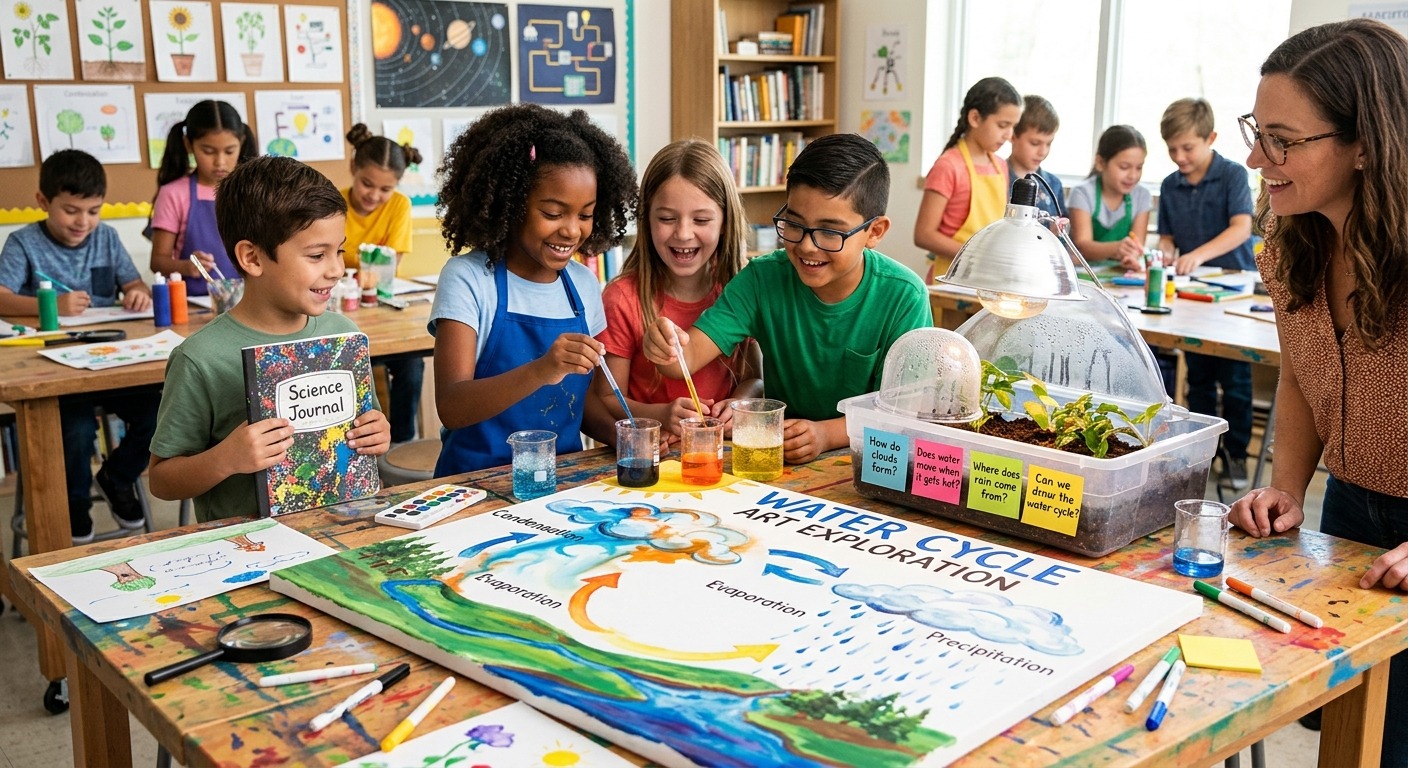
Something shifts in a classroom the moment a student asks a question you didn’t plan for. Eyes come up from notebooks. The energy changes. That genuine flicker of curiosity is exactly where the best science learning begins. And when you pair it with art-making, what comes out the other side is the kind of understanding that sticks for years.
The Inquiry Art Cycle at a Glance
- Students generate their own science questions, making the learning personal from the very beginning.
- Research happens across multiple sources, including AI tools that help clarify terminology and deepen thinking.
- Findings become original artwork that makes abstract concepts visible and sparks whole-class conversation.
Why Student-Generated Questions Change Everything
Most science lessons start with the teacher’s question. That is not wrong, but it does mean students spend most of the lesson answering someone else’s curiosity. Flipping this creates a very different dynamic.
When you hand over question-generation to students, they immediately have skin in the game. A third-grader who wants to know why leaves change color pays very different attention to a lesson about photosynthesis than a student who was simply handed a worksheet about chlorophyll.
Start any science unit with a dedicated “wondering” session. Give students five to ten minutes with a blank page and one simple prompt: What do you want to understand about this topic? Encourage volume over perfection. Messy questions are fine. Incomplete questions are fine. The goal is to surface genuine curiosity, not polished hypotheses.
After the wondering session, gather the class and cluster similar questions together on the board. Students often see their own question reflected in a classmate’s version of the same idea. This is a natural bridge into collaborative research groups.
Structuring the Research Phase for Real Depth
Once students have their driving questions, the research phase begins. This is where teachers do some of their most meaningful modeling. Students need to see that good researchers use many types of sources, not just the first website that loads.
Model the process explicitly. Sit at the projector and think aloud. Show students how you move between a nonfiction book, a scientific diagram, a short documentary clip, and a primary source like a field photograph taken by a researcher. Each type of source offers something different. A diagram might show the structure of a cell clearly, while a photograph from a marine biologist’s expedition captures something a diagram can never quite communicate.
During this phase, one of the most useful moves a teacher can make is to pause and model what to do when a scientific term stops you cold. Vocabulary is a real barrier in science. Students hit words like “photosynthesis,” “tectonic,” or “osmosis” and sometimes just skip past them, leaving gaps in their understanding that quietly grow over time.
This is a genuine, practical moment to show students how to ask AI a focused question. Project the interaction for the class. Type something like: “Can you explain what osmosis means in simple terms, and give me one follow-up question I could research?” Watch students lean forward. The AI response becomes a launchpad. Students see that asking for clarification is a skill, not a weakness, and that good researchers do it constantly.
This is not about replacing other sources. The textbook, the library, the documentary clip , they all still matter. The AI moment is one tool in a full toolbox, modeled deliberately by the teacher as part of a multi-source strategy.
Moving from Research Notes to Visual Thinking
After students have gathered information from several sources, ask them to stop writing and start sketching. This transition is powerful and slightly uncomfortable for students who associate science with words and numbers rather than images.
The prompt is simple: Draw what you now understand.
This is not about artistic skill. A student who draws a water cycle using stick figures and arrows is doing exactly the right thing. The act of translating information into a visual form forces a kind of synthesis that note-taking rarely achieves. Students have to decide what matters most. They have to figure out how things relate to each other spatially. They have to make choices, and those choices are deeply informative.
Once the rough sketch exists, students move into the art-making phase. This is where you bring in whatever materials fit your classroom. Watercolors work beautifully for ecosystem projects. Cut paper collage suits anatomy units. Printmaking can carry a great deal of weight in lessons about patterns in nature. The medium should feel connected to the content, even loosely.
Making the Finished Artwork a Discussion Tool
The artwork is not the endpoint. It is a discussion starter.
After students finish their pieces, arrange a gallery walk. Students move around the room, leaving sticky note observations on each other’s work. Prompts like “I notice…” and “This makes me wonder…” keep the conversation scientific without turning it into a critique of the art itself.
What emerges from this gallery walk is often remarkable. Students start asking new questions. They notice gaps in their own understanding when they see how a classmate visualized the same concept differently. The artwork becomes evidence of thinking, not just decoration on the wall.
Whole-class debrief after the gallery walk gives the teacher a natural formative assessment moment. Listen for misconceptions. Listen for connections students are making across disciplines. A student who links a painting of ocean currents to a lesson on climate from two months ago is doing exactly the kind of thinking this structure is designed to produce.
Grade-Band Adaptations That Fit Any Classroom
This cycle works across grade levels, but the scaffolding shifts considerably depending on the age group. Here is how to adjust each phase of the cycle for the students in front of you:
- Grades K-2: Keep wondering sessions oral rather than written. Use sentence frames like “I want to know why…” and record student questions on chart paper. Research happens through read-alouds and picture books. Art materials should be familiar: crayons, paint, torn paper. The gallery walk becomes a share circle where students hold up their work and narrate it in one sentence.
- Grades 3-5: Students can write their own questions independently and begin using a simple note-taking organizer with columns for “source type” and “what I learned.” Research groups of two or three work well. Art pieces can incorporate labels and captions that connect directly to the science vocabulary from their research.
- Grades 6-8: Introduce a formal claim-evidence-reasoning structure during the research phase. Students should be able to articulate why they chose each source and what it added. Art-making can involve mixed media, and brief artists’ statements become part of the finished work. Gallery walks include peer feedback forms that ask students to evaluate both the scientific accuracy and the visual communication of each piece.
- Grades 9-12: The inquiry cycle becomes more independent. Students design their own research plans, identify credible sources without prompting, and create artwork that functions as an argument rather than just an illustration. Peer critique sessions use discipline-specific language from both art and science. The rubric below applies at all levels but carries considerably more weight at this stage.
A Rubric That Respects Both Disciplines
The single biggest hesitation teachers have about art-integrated science lessons is assessment. How do you grade a drawing? The answer is that you grade the thinking, not the technique.
A solid rubric for this cycle has four criteria. Scientific accuracy measures whether the content in the artwork reflects what the student actually learned. Completeness asks whether the student addressed their driving question fully. Visual communication evaluates whether the artwork is clear and intentional, regardless of artistic polish. Reflection assesses the student’s ability to explain their choices in words, either through a written artist’s statement or a brief conversation with the teacher.
Each criterion works well on a simple three-point scale: beginning, developing, and proficient. You are not asking whether the artwork is beautiful. You are asking whether it shows thinking. Share this rubric with students before they begin the research phase, not after. When students know what evidence of thinking looks like, they make better choices throughout the entire cycle.
When Curiosity Becomes a Finished Piece of Science
The real strength of this approach is that it never truly ends. A student who paints a cross-section of a volcano has a memory of that content that no multiple-choice test can replicate. The tactile experience of mixing colors to represent lava flow, the decision about where to place the magma chamber, the conversation with a classmate about whether the ash cloud looks right , all of that is deep learning, built from a question the student chose to ask.
Teachers who run this cycle once almost always run it again. Not because it is easy, but because the results are visible in a way that traditional science instruction rarely is. You can see what students understand. You can see where their thinking breaks down. And you can see, written in watercolor or cut paper or colored pencil, exactly how a curious mind makes meaning from the world around it.
That is the core of inquiry-based learning. The student is not receiving information passively. The student is constructing understanding actively. Art just makes that construction visible to everyone in the room, and turns a science lesson into something a student might actually remember a decade from now.