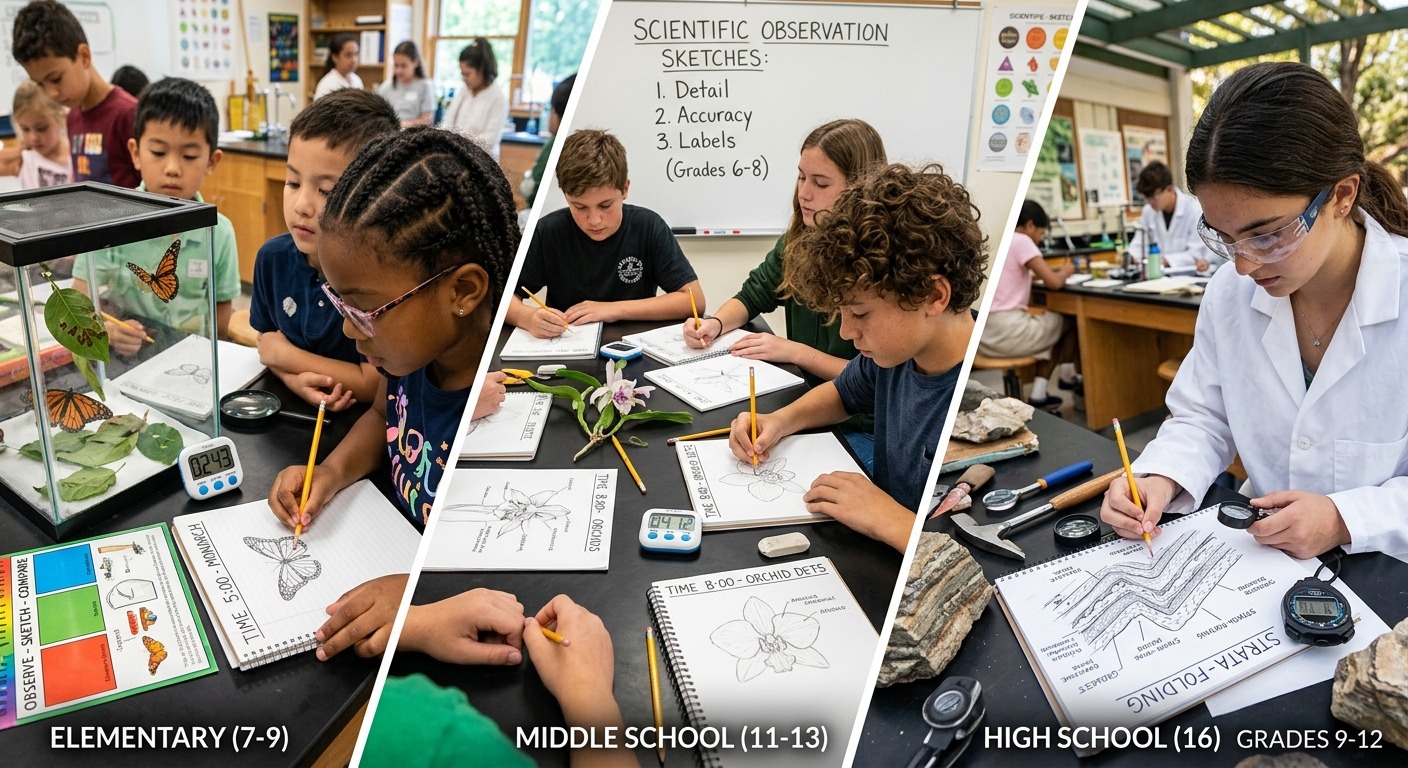
A fourth grader holds a pencil above a blank page and stares at a dried sunflower head pinned to a tray. She does not write a word. She just looks. After thirty seconds, her pencil starts to move, slowly tracing the spiral arrangement of seeds she had never consciously noticed before. That quiet, committed moment is where real science begins.
Timed observation sketches are one of the most underused strategies in K-12 classrooms. The concept is straightforward: give students a specimen, a natural object, or a phenomenon. Set a timer. Ask them to draw what they actually see, not what they assume is there. Then build from those raw sketches into structured partner talk and whole-class revision. The result is a class that observes more carefully, reasons more precisely, and talks about science with far more specificity than worksheets alone ever produce.
When students sketch before they speak, observation sharpens in ways that lab worksheets simply cannot replicate.
- Structured drawing sessions slow students down enough to notice details they would otherwise skip entirely.
- The draw-discuss-revise cycle builds scientific vocabulary from students’ own observations, not from definitions handed down at the start of class.
- A visible countdown keeps every student engaged through each round, creating a sense of productive urgency that carries all the way through the debrief.
Why Drawing Forces Deeper Looking
There is a reason scientists have kept detailed field sketchbooks for centuries. Drawing is not decoration. It is a form of attention. When a student tries to put a line on paper that actually matches what they see, they are forced to slow down, look again, and then look one more time after that.
Verbal discussion in science class tends to jump straight to answers. A student sees a rock sample and says “it’s shiny.” But when they try to draw the shininess, they have to figure out where the light actually hits, which facets reflect it, and which do not. That second layer of looking is where scientific thinking lives.
This approach aligns naturally with scientific practices in the Next Generation Science Standards, particularly the expectation that students obtain, evaluate, and communicate information through direct engagement with phenomena. Sketching is one of the most accessible ways to practice that at any grade level.
The Draw-Discuss-Revise Cycle, Step by Step
The heart of this strategy is a three-part cycle you can run multiple times in a single class period. Each loop tightens the quality of observation a little more. Here is how it flows:
- Draw. Students sketch the specimen or object in silence for a set amount of time, usually two to five minutes depending on grade level. No labels yet. No talking. Just looking and drawing what is actually in front of them.
- Discuss. Students turn to a partner and compare sketches. The core question is: what did you draw that I missed, and what looks different between our two versions? Partners talk for one to two minutes before a short whole-class share-out.
- Revise. Students return to their sketches and add, correct, or annotate based on what came out in discussion. Labels and scientific notes begin to appear here naturally, because students now have specific things they want to record.
You can run two or three of these cycles in a fifty-minute period. Each round asks students to look at the same object again with fresh attention and a more specific question driving the looking.
A Full Classroom Scenario, Start to Finish
Picture a seventh-grade life science class. The teacher has placed a small preserved fish specimen in a tray at each lab table. Students have blank paper and pencils. There is no vocabulary list on the board. There are no instructions beyond “draw what you see.”
Round One: The Cold Observation Sketch
The teacher projects a classroom timer on the screen, counting down three minutes. The room goes quiet almost immediately. Students begin drawing, most starting with the overall body shape. A few focus on the tail first. One student is already counting fin rays along the dorsal surface.
When the timer sounds, nobody groans. The energy is alert, not restless. The countdown did not just keep time. It created a container. Students knew the round was finite, so they committed to it fully rather than waiting for the activity to feel more comfortable.
Round Two: Partner Talk and Focused Looking
Partners compare sketches for ninety seconds. The teacher circulates and listens. She hears one pair debating whether the fish has one dorsal fin or two. She does not resolve it. She tells them to look more carefully in the next round and let their eyes decide.
The whole class shares out for two minutes. The teacher writes student-generated observations on the board in the students’ own words: “the scales overlap like roof tiles,” “the eye has a dark ring around it,” “the pectoral fins stick out sideways at a different angle than I thought.” These are not lifted from a textbook. These are observations students earned by looking carefully at a real specimen.
Round Three: Revision and Annotation
Students return to their sketches for another four minutes. Now they add labels based on what they noticed during discussion. Students who missed the two-part dorsal fin the first time are searching for it now with clear purpose. One student starts a separate, zoomed-in sketch of just the head region.
After the timer sounds, the class debriefs together. The teacher asks one question: what changed between your first sketch and your final one? Nearly every student can point to something specific. That capacity to name their own growth is the clearest sign this strategy is working.
Setting Up the Space for Observation Sketching
You do not need a specialized lab setup to run this activity well. Most classrooms can handle it with a few deliberate preparations. These tend to make the biggest difference:
- Use natural objects with genuine complexity: seed pods, mineral specimens, preserved insects, shells, cross-sections of fruit, or even a candle flame for a physics or chemistry context.
- Place specimens on a clean white tray or sheet of paper so students can examine them from multiple angles without clutter distracting the eye.
- Provide hand lenses at each table and introduce them in the second or third round rather than the first. Students should develop an initial impression before magnification changes what they see.
- Give students unlined paper. Lines on paper suggest writing. A blank page says: this is a space for drawing.
How This Strategy Adapts Across Grade Levels
One of the most practical qualities of timed observation sketching is how naturally it scales across the K-12 span. The core structure stays the same. What shifts is the complexity of the object and what students are expected to capture in their sketches.
Adjusting Depth and Complexity by Grade Band
| Grade Band | Specimen or Object | Sketch Expectation | Timer Per Round |
|---|---|---|---|
| K-2 | Pinecone, large seed, or flower | Overall shape plus one noticed detail | 2 minutes |
| 3-5 | Insect specimen, rock sample, or leaf cluster | Shape, texture, and basic proportion | 3 minutes |
| 6-8 | Fish specimen, mineral crystal, or chicken wing | Detail, emerging labels, and scale notation | 4 minutes |
| 9-12 | Prepared slide, chemical reaction, or anatomical model | Full annotation with emerging hypothesis notes | 5 minutes |
What Student Sketches Reveal About Scientific Thinking
Student sketches function as formative assessment in a way that multiple-choice questions never can. A sketch shows you what a student actually perceived, not what they memorized. Over time, patterns emerge that tell you exactly where their observational thinking is growing and where it still needs support.
Look for these specific signs of growing scientific attention across your students’ work:
- Revision marks and corrections. These show a student looked again rather than accepting the first impression as final.
- Zoomed-in inset drawings. A student who creates a separate close-up of one area recognized, unprompted, that a single part deserved deeper study.
- Proportion attempts, even clumsy ones. Trying to draw things to relative scale means the student was actively comparing sizes rather than just recording shapes.
- Questions written in the margins. A student who writes “why does this part look asymmetrical?” is practicing science at its most fundamental level.
The Pencil as the First Scientific Instrument
Teachers sometimes feel they need to justify drawing in a science class. They worry it will look off-task, or that it belongs in art and not in a lab setting. But the line between observational art and scientific illustration is far thinner than it appears. Both require sustained attention. Both ask the observer to make decisions about what matters in what they are seeing. Both produce a record that can be returned to, questioned, and revised.
When students pick up a pencil before they pick up any vocabulary, they are practicing the foundational move of scientific inquiry: looking without preconception. That is genuinely difficult. It runs against the grain of how most lessons are structured, where the label comes first and observation fills in around it afterward.
Flip that sequence and the quality of what students notice changes. Sketches become more detailed over repeated rounds. Questions students ask grow more specific. Discussions after each round get richer, because students have something real and self-generated to point to. That is not just a drawing exercise. It is scientific thinking in its most honest, classroom-tested form.
Any teacher can run this tomorrow with objects already in the building. A pencil, a blank page, a timer, and something worth looking at. That combination has built careful observers for a very long time. It still does.