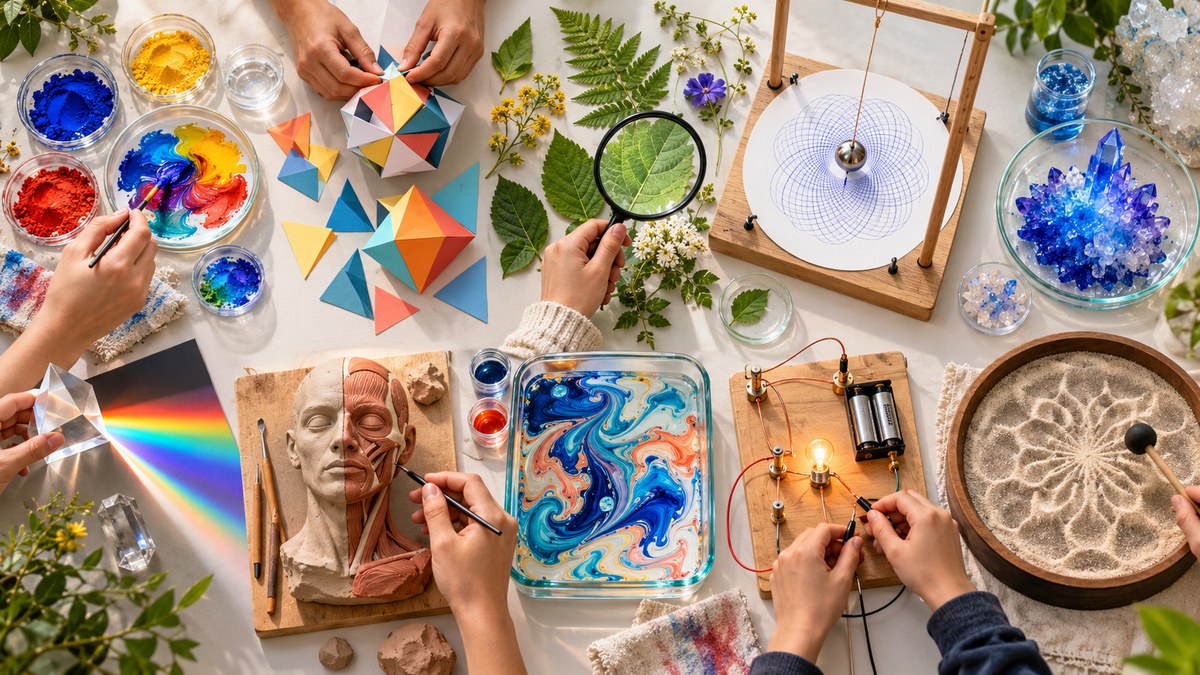
The classroom hums with a different energy today. On one table, a student carefully mixes pigments to match the exact blue of a kingfisher feather. On another, a small group measures the angle of a shadow cast by a handmade sundial. There is no divide between art and science here. The painter uses the same careful observation as the physicist. The sculptor thinks about balance and force the same way an engineer does. When we separate these subjects, we lose something important. When we bring them together, students see the world as it really is: a place where creativity and logic are the same language.
Art and science are not opposites. They are two sides of the same coin. This guide gives you ten hands-on activities that blend creative expression with scientific principles. Each activity is designed for a STEAM classroom or home setting. You will find step-by-step instructions, a troubleshooting table, and expert advice to help your students build skills in observation, experimentation, and creative problem solving.
Why Art and Science Belong Together in 2026
Think about the last time you watched a child build something with blocks. They test, they adjust, they knock it down and start again. That is the scientific method in action. Now think about the same child mixing paint colors to get the perfect shade of green. That is chemistry, observation, and aesthetic choice happening at the same time. In 2026, the best classrooms do not force a choice between these worlds. They build bridges.
The activities below are designed to do exactly that. They work for a wide range of ages, from early elementary through middle school. Some are better suited for small groups, others for individual exploration. Each one starts with a question, not an answer.
1. The Color Chemistry Lab
This activity turns paint mixing into a lesson about absorption, reflection, and the visible spectrum. Students create their own color wheels using only the three primary colors. They then test how different light sources change the appearance of their mixes.
What you need:
– Red, yellow, and blue tempera paint
– White paper or canvas squares
– Paintbrushes and water cups
– A flashlight and a colored light bulb (or colored cellophane)
Steps to follow:
1. Place a small amount of each primary color on a palette.
2. Mix two colors at a time to create secondary colors. Record the exact ratio used.
3. Paint a simple shape with the new color. Let it dry.
4. Shine the flashlight through the colored cellophane onto the painting. Note how the color shifts.
5. Write a prediction about why the color looks different under different light.
This is a simple way to show that color is not a fixed property. It depends on the light that hits it. That is physics, and it is also art.
2. Shadow Catchers and Sundials
Tracking shadows teaches students about the Earth’s rotation and the geometry of light. It also creates beautiful, ephemeral art.
What you need:
– A sunny window or outdoor space
– White paper and a pencil
– A small object (a toy, a leaf, a block)
– A ruler or measuring tape
Steps to follow:
1. Place the paper on a flat surface in direct sunlight.
2. Put the object in the center of the paper.
3. Trace the shadow of the object at 9:00 AM, 12:00 PM, and 3:00 PM.
4. Measure the length and angle of each shadow. Record the data in a table.
5. Use the data to predict where the shadow will be at 4:30 PM. Test your prediction.
The results create a layered drawing that looks like a piece of modern art. The process teaches timekeeping, angular measurement, and the scientific habit of prediction.
3. Crystal Gardens and Geometry
Growing crystals is a classic science experiment. Adding food coloring and controlling the shape of the growing surface turns it into a sculptural art project.
What you need:
– Borax or Epsom salts
– Hot water
– Glass jars
– Pipe cleaners
– Food coloring
Steps to follow:
1. Shape the pipe cleaners into a simple form (a star, a tree, a spiral).
2. Tie a string to the shape and hang it inside the jar so it does not touch the sides.
3. Dissolve as much borax as possible into the hot water. Add a few drops of food coloring.
4. Pour the solution into the jar. Wait 24 hours.
5. Observe the crystal growth. Sketch the pattern.
Crystals form in repeating geometric patterns. The colors and shapes students choose are artistic, but the growth follows strict chemical rules. This is a perfect example of nature using math to create beauty.
4. The Physics of Paper Airplane Design
This is not just about folding paper. It is about testing variables: wing shape, weight distribution, and launch angle.
What you need:
– Printer paper
– A ruler
– A tape measure
– A notebook for recording data
Steps to follow:
1. Fold three different paper airplane designs. Use a standard design, a dart design, and one of your own creation.
2. Throw each plane from the same spot. Measure the distance and observe the flight path.
3. Change one variable at a time. Add a paperclip to the nose. Fold the wings up slightly.
4. Record the results in a table.
5. Draw a diagram of your best design. Label the parts that helped it fly farther.
This activity combines engineering, physics, and visual design. The final diagram is a technical drawing that also shows aesthetic choices.
5. Nature’s Palette: Leaf Rubbing and Pigment Extraction
Students collect leaves and use them to create art while learning about plant biology and chromatography.
What you need:
– Fresh leaves of different shapes and colors
– White paper
– Crayons (remove the paper wrapper)
– Coffee filters
– Rubbing alcohol
– Small cups
Steps to follow:
1. Place a leaf under a sheet of paper. Rub the side of a crayon over the paper to reveal the leaf’s texture.
2. Collect several rubbings on one page to create a composition.
3. Tear a leaf into small pieces. Put the pieces in a cup with a tablespoon of rubbing alcohol.
4. Place a strip of coffee filter in the cup. Watch the pigment travel up the paper.
5. Compare the colors from different leaves. Note which pigments move fastest.
The leaf rubbing teaches texture and shape. The chromatography experiment reveals the hidden pigments inside the leaf. Both activities rely on careful observation.
6. Sound Waves on a Drum
This activity makes sound visible. Students stretch a membrane across a container and watch salt or sand dance on top.
What you need:
– A large bowl or plastic container
– Plastic wrap or a latex balloon
– A rubber band
– Salt or fine sand
– A metal spoon
Steps to follow:
1. Stretch the plastic wrap tightly over the bowl. Secure it with the rubber band.
2. Sprinkle a thin layer of salt on top of the wrap.
3. Hold the spoon near the drum but do not touch it. Tap the spoon against the side of the bowl.
4. Watch the salt jump and form patterns. Try different volumes and pitches.
5. Sketch the patterns you see. Try singing a note near the drum.
The patterns change with frequency. This is a direct visual representation of sound energy. It is also a beautiful, ever-changing piece of performance art.
7. The Geometry of Islamic Tile Design
Creating repeating geometric patterns teaches symmetry, rotation, and translation. It also connects to a rich artistic tradition.
What you need:
– Graph paper
– A compass
– A ruler
– Colored pencils
Steps to follow:
1. Draw a circle with the compass. Divide it into six equal parts using the compass width.
2. Connect the points to create a hexagon.
3. Extend lines from the hexagon to create a star pattern.
4. Repeat the pattern across the page. Color the shapes so that no two touching shapes are the same color.
5. Measure the angles in your pattern. Label each angle.
This is a direct link between visual art and geometry. The patterns are based on mathematical principles, but the final result is decorative and personal.
8. Homemade Lava Lamps and Density
This classic experiment uses oil, water, and Alka-Seltzer to create a mesmerizing display. It teaches about density and chemical reactions.
What you need:
– A clear plastic bottle
– Vegetable oil
– Water
– Food coloring
– Alka-Seltzer tablets
Steps to follow:
1. Fill the bottle one quarter full with water. Add food coloring.
2. Fill the rest of the bottle with oil. Leave a small space at the top.
3. Break an Alka-Seltzer tablet into pieces. Drop one piece into the bottle.
4. Watch the blobs of colored water rise and fall. Record how long the reaction lasts.
5. Try different temperatures of water. Does it change the reaction speed?
The visual effect is artistic and hypnotic. The science behind it involves density, immiscibility, and gas production. Students can photograph or sketch the results.
9. Cyanotype Sun Prints
This is a photographic process that uses ultraviolet light to create blue and white images. It is chemistry, light physics, and visual art in one.
What you need:
– Cyanotype paper or solution
– Objects to use as stencils (leaves, keys, paper cutouts)
– A flat surface
– A tray of water
Steps to follow:
1. Place the cyanotype paper on a flat surface in a dim room.
2. Arrange your objects on the paper. Make sure they lie flat.
3. Take the paper outside into direct sunlight. Wait 5 to 10 minutes.
4. Bring the paper inside. Rinse it in the tray of water for 2 minutes.
5. Let the print dry. The blue will deepen over the next hour.
The results are stunning. Students learn about UV radiation, chemical reactions, and composition. Each print is unique.
10. Mapping the Invisible: Data Art
Turn a scientific dataset into a visual artwork. This activity teaches data literacy and design thinking.
What you need:
– Graph paper
– A simple dataset (temperature for a week, plant growth measurements, local rainfall)
– Colored pencils or markers
– A ruler
Steps to follow:
1. Collect or find a dataset with at least 10 data points.
2. Create a bar graph or line graph on the graph paper.
3. Replace the standard bars with drawings. For example, use an ice cream cone for each temperature reading.
4. Color the graph using a gradient that reflects the data values. Higher numbers get warmer colors.
5. Write a one-sentence story about what the data shows.
This activity transforms a math skill into a creative project. The student has to understand the data to represent it accurately. That is the heart of scientific communication.
Common Pitfalls and How to Avoid Them
Even the best activities can fall flat without the right approach. The table below shows common mistakes and simple fixes.
| Mistake | What Happens | How to Fix It |
|---|---|---|
| Over-explaining the science | Students lose interest | Let them ask the questions first. Start with the art. |
| Skipping the messy setup | Students rush through the activity | Prep materials in advance. Set a timer for each step. |
| Focusing only on the final product | Students miss the process | Ask “what did you notice?” instead of “what did you make?” |
| Using only one type of material | Students get bored | Offer choices in paper, paint, or objects. |
| Forcing a specific outcome | Students feel frustrated | Frame it as an experiment. Wrong results are data. |
“The best interdisciplinary lessons feel like play. When a student is mixing colors or folding paper, they are already using scientific thinking. Your job is to ask the right question at the right moment.” — A STEAM teacher with 15 years of experience
How to Plan Your First Art and Science Lesson
Starting is easier than you think. You do not need a full lab or an art studio. You just need curiosity and a few basic supplies.
A simple planning checklist:
– Pick one activity from the list above.
– Gather the materials the night before.
– Start with a question, not an explanation. “What do you think will happen when we add the Alka-Seltzer?”
– Let students work in pairs. Collaboration builds communication skills.
– End with a share-out. Have each pair show their results and explain one thing they learned.
For more ideas on building a classroom that blends these subjects, read about how to design interdisciplinary projects that ignite student curiosity in 2026. You might also find value in why combining art and science unlocks deeper student engagement than any single subject.
The Real Language of Discovery
When you watch a student trace a shadow or mix a new color, you are watching someone learn the language of discovery. Art and science both ask us to pay attention. They both reward patience. They both thrive on the question “what if?”
The ten activities in this guide are starting points. Once your students see that the same thinking skills apply to a painting and a physics experiment, they will start making their own connections. They will ask better questions. They will trust their own observations. And they will understand that creativity and logic are not separate subjects. They are the same beautiful, messy, wonderful language.
So pick one activity. Set out the materials. Ask the first question. Then step back and watch what happens.